Befrey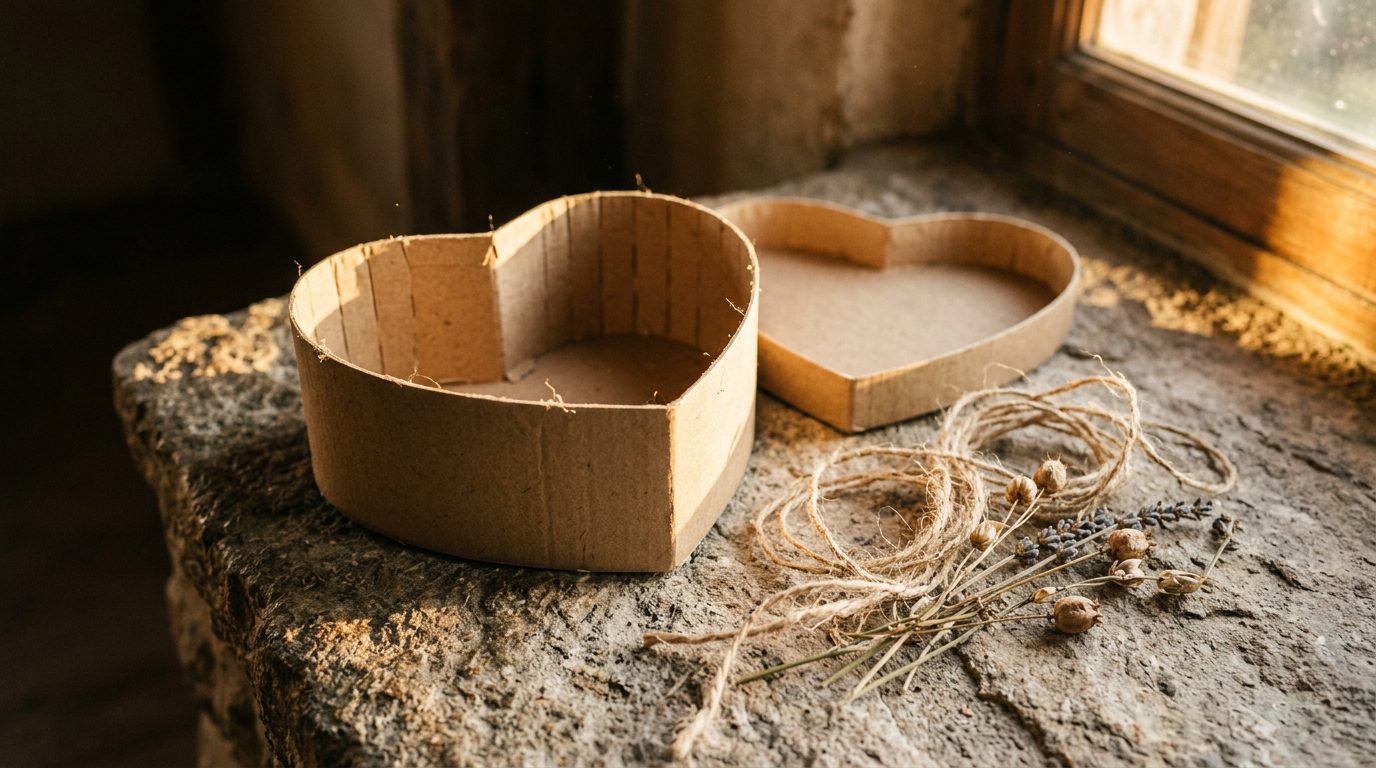
Crafting custom packaging at home turns ordinary presents into memorable keepsakes. High-end retailers charge massive premiums for bespoke packaging. Yet, you can achieve superior artistic quality using simple household materials. Understanding how to work with paperboard structures allows you to manipulate folds, tension, and structural integrity. Learning the core principles behind DIY cardboard gift boxes gives you total creative control over your presentation. You will eliminate unnecessary spending while elevating your gift-giving experience. Every fold, seam, and edge becomes an opportunity to show personal care and artistic precision.
How to make a gift box out of cardboard with Precision Measurement
Creating a perfectly fitted container begins with accurate dimensional planning. You need a clean cutting mat, a heavy-duty utility knife, and a metal ruler. Measure your item completely before marking your raw material with a fine pencil. Allow a two-millimeter clearance buffer around all sides so the contents sit comfortably without bulging. Scoring along your designated fold lines breaks the inner paper grain without cutting through the outer layer. This single technique ensures crisp, professional 90-degree corners that hold structural integrity under pressure.
Easy DIY cardboard gift box step by step for Flawless Presentation
Building a reliable container does not require advanced crafting experience or expensive commercial machinery. Following a structured system ensures consistent result every single time you build. Beginner crafters often struggle because they rush the folding process or apply liquid adhesives incorrectly. By mastering a standardized easy DIY cardboard gift box step by step workflow, you eliminate guesswork entirely. You will transform flat sheets into rigid three-dimensional structures within minutes. This systematic approach guarantees clean aesthetics and robust protection for any delicate item.
Selecting Ideal Material Density for Structural Stability
Choosing the right thickness determines whether your container maintains its shape or collapses under weight. Single-wall corrugated sheets offer exceptional rigidity for larger items. Thinner paperboard works best for intricate shapes, small favors, and sharp folds. Test the flexibility of your sheet before applying glue or scoring lines. Material that feels overly soft will warp when exposed to wet adhesives. Stiff sheets require deeper scoring to prevent jagged edges along the seams. Matching material density to item weight is the foundation of durable handcrafted packaging.
How to fold a gift box from a cardboard box Without Glues or Fasteners
Origami techniques allow you to assemble rigid, self-locking containers entirely through structural tension. You can construct exceptional packaging without relying on tape, liquid glue, or hot adhesive guns. Learning how to fold a gift box from a cardboard box relies on precise geometric angles and sharp creases. Integrated locking tabs fit securely into pre-cut slots, holding the walls tightly together under natural tension. This mechanical connection prevents structural failure and creates a surprisingly sturdy frame. It is an efficient, clean method ideal for rapid gift preparation.
Master the Self-Locking Flap System
Self-locking flaps eliminate the need for drying time, allowing instant container assembly. Cut angled notches into your locking tabs so they slide smoothly into corresponding interior slits. The outward pressure of the folded sides holds the tab firmly in place. This creates a secure mechanical lock that will not pop open during transport. Ensure your slits match the exact width of your tabs to prevent looseness. Precision cutting during this phase guarantees a tight, seamless finish that mimics luxury retail design.
Cheap homemade gift box ideas with cardboard for High-End Style on a Budget
Luxury packaging often relies on tactile texture and visual minimalism rather than expensive raw materials. You can easily duplicate the appearance of high-end boutique boxes using free household items. Exploring cheap homemade gift box ideas with cardboard allows you to upcycle discarded delivery packaging into stunning artwork. Plain brown shipping surfaces provide a rich, warm, neutral canvas that contrasts beautifully with natural twines, deep ribbons, or white lace. Applying basic design principles transforms plain surfaces into sophisticated, high-value presentations without spend.
Upcycling Common Household Items into Decorative Enhancements
Everyday items in your recycling bin offer endless decorative potential for custom packaging projects. Pressed dried leaves, botanical stems, fabric scraps, and jute string add rich texture to rustic containers. You can apply diluted acrylic paint with a dry sponge to create a soft, distressed finish on raw surfaces. Stenciling intricate geometric patterns gives plain surfaces a modern, high-end appearance. Combining natural elements with minimalist box shapes creates an organic aesthetic that outshines mass-produced plastic wrapping.
DIY cardboard box craft for gift wrapping That Outshines Store-Bought Paper
Wrapping gifts in standard thin paper often results in torn edges, visible tape marks, and saggy corners. Building a rigid structural container completely eliminates these common frustrating wrapping problems. Engaging in a DIY cardboard box craft for gift wrapping offers a solid structure that protects fragile items during transport. Custom containers hold their shape perfectly beneath outer ribbons, creating a sleek silhouette. Furthermore, rigid containers can be reused multiple times by the recipient, reducing holiday waste while offering continuous practical value.
Creating Structural Rigidity for Fragile Presents
Fragile gifts require firm support to prevent accidental crushing during shipping or handling. Build interior support collars by folding strips of dense paperboard into triangular tubes along the internal perimeter. These internal columns absorb external pressure and distribute weight evenly across all four corners. Cushion the interior base with shredded craft paper or crushed tissue for additional shock absorption. This structural combination ensures your delicate presents arrive in flawless condition every single time.
How to make a small gift box with lid out of cardboard for Delicate Keepsakes
Jewelry, small electronics, and delicate keepsakes require precise, compact packaging with snug-fitting tops. A loose lid looks unappealing and risks slipping off unexpectedly during handling. Learning how to make a small gift box with lid out of cardboard requires constructing two separate components with exact proportion adjustments. The top cover must measure approximately three millimeters larger than the base on all horizontal dimensions. This precise gap ensures a smooth, satisfying friction fit that stays securely closed without binding or warping.
The Physics of Perfect Lid Clearance
Achieving a luxury friction fit depends entirely on calculating exact material displacement during folding. When paperboard folds at right angles, the material thickness adds dimension to the outer wall. Always account for double the board thickness when drafting your top template. If your base measures ten centimeters square, your top template must measure ten point three centimeters square. This calculated buffer allows the lid to slide down smoothly, compressing trapped air while creating an elegant suction effect upon closing.
Creative ways to make gift boxes from recycled cardboard for Eco-Friendly Luxury
Environmental responsibility and high-end design mix seamlessly through thoughtful upcycling practices. Discarded product packaging, appliance cartons, and grocery boxes offer abundant, high-quality raw materials. Exploring creative ways to make gift boxes from recycled cardboard allows you to turn trash into beautiful structural art. Stripping away the plain top layer of corrugated board exposes a rich, textured fluting underneath. This exposed texture creates striking architectural contrast when combined with smooth panels, giving your gifts an edgy, contemporary appeal.
Peeling Corrugated Flutes for Tactile Textures
Exposing internal corrugated flutes adds a sophisticated architectural element to handmade containers. Lightly dampen the top paper layer of a corrugated sheet using a barely moist sponge. Wait ninety seconds for the water to dissolve the starch adhesive without warping the base. Gently peel the outer paper layer back at a forty-five-degree angle to reveal the parallel ridged flutes underneath. Allow the sheet to dry completely before cutting. Use this textured material for decorative lid bands, accent panels, or structural container bodies.
DIY aesthetic cardboard gift box ideas to Wow Every Recipient
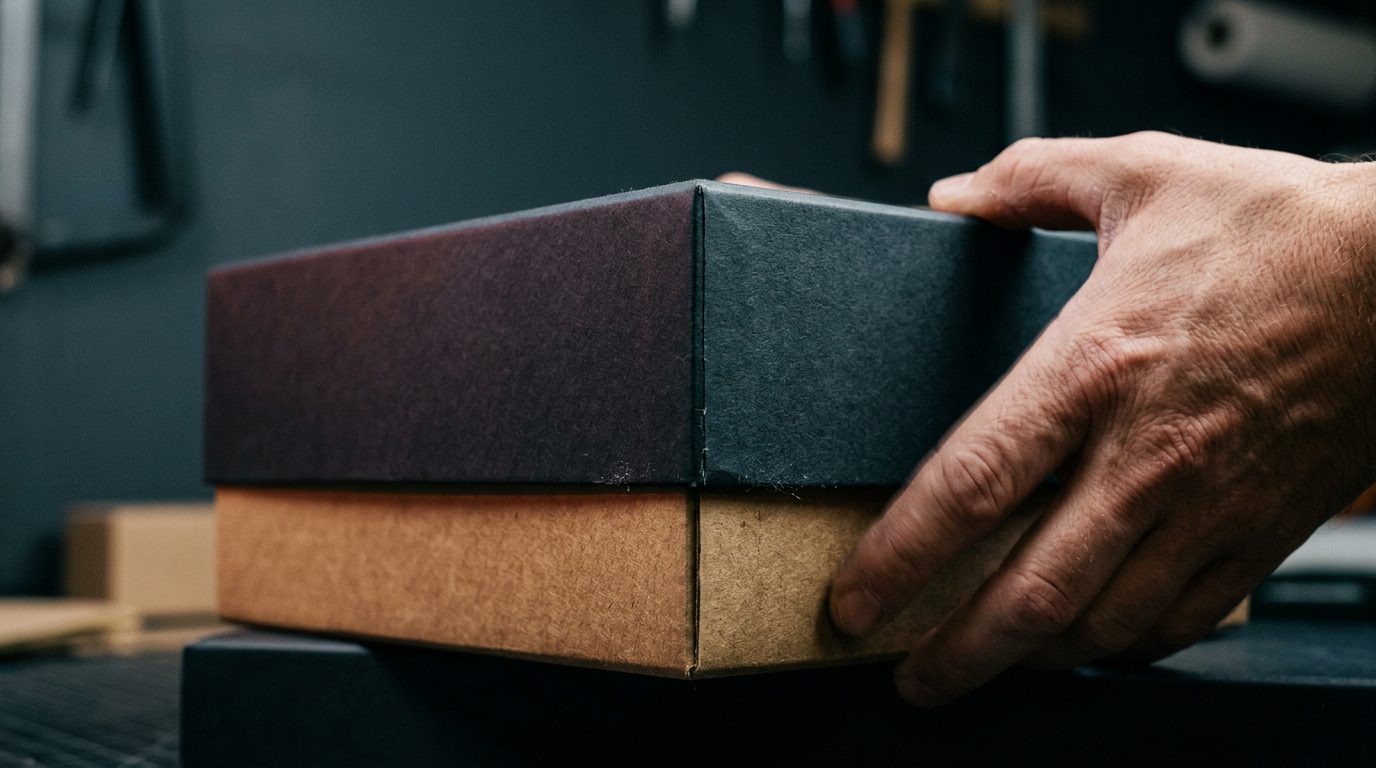
Modern gift aesthetics favor clean lines, organic textures, monochrome palettes, and intentional minimalism. You can create striking visual contrast by pairing raw brown surfaces with sharp geometric accents. Incorporating DIY aesthetic cardboard gift box ideas helps you break away from outdated, busy wrapping paper patterns. Matte black paint accents, white wax stamps, and monochromatic typography bring an ultra-modern feel to simple paperboard. These stylish design elements turn humble materials into art pieces that recipients often save and display long after unwrapping.
Mastering Minimalist Design Principles
Minimalist packaging relies on flawless execution rather than heavy ornamentation. Focus on perfectly straight cuts, sharp corner creases, and completely hidden glue seams. Use a high-density white or black paint pen to draw clean freehand illustrations, fine lines, or custom calligraphy directly onto raw surfaces. Contrast the rough texture of brown paperboard with a single, high-quality silk or velvet ribbon band. Restraint in decoration highlights the structural precision of your container, creating an unmistakable impression of luxury.
How to make a heart shaped cardboard gift box for Romantic Celebrations
Curved structural containers present a unique crafting challenge because rigid paperboard naturally resists sweeping organic bends. Constructing a heart-shaped container requires building a rigid bottom base and shaping flexible side walls around its perimeter. Learning how to make a heart shaped cardboard gift box involves scoring fine vertical slits along the interior wall band. These closely spaced score lines relieve surface tension, allowing the rigid material to curve smoothly without kinking along the heart’s sweeping arcs.
Bending Rigid Cardboard Without Kinking
Curving flat paperboard without creasing requires calculated surface scoring along the interior side. Space parallel score lines three millimeters apart along the entire length of your side wall strip. Wrap the scored strip firmly around a wooden dowel or cardboard tube to train the paper fibers into a natural curve. Attach this curved wall to your heart-shaped base using small triangular tabs scored along the bottom edge. Securing these tabs with quick-drying glue creates a smooth, continuous wall that holds its shape permanently.
Easy handmade gift box without template for Fast Last-Minute Wrapping
You do not need printable online templates, specialized drafting software, or digital plotters to build custom containers. A basic understanding of proportional grid geometry allows you to draft designs directly onto your material using only a ruler. Learning an easy handmade gift box without template technique enables you to manufacture custom containers of any size on demand. By dividing any square sheet into a three-by-three grid system, you create the universal foundation for instant wall and lid construction without measuring complex angles.
The Universal Nine-Square Grid Method
Start with a perfectly square sheet of dense paperboard cut to your desired size. Use a pencil and ruler to divide the square into nine equal smaller squares, creating a three-by-three grid. Cut along the four outer score lines parallel to two opposite sides to form corner tabs. Fold all nine squares inward along the grid lines using a bone folder or ruler edge. Secure the four corner tabs inside the adjacent side walls using quick-drying adhesive. This rapid method yields a square container within minutes.
How to make a sturdy gift box from shipping box for Heavy Items
Standard lightweight paperboard containers often buckle, tear, or warp when housing heavy gifts like books, ceramics, or glass bottles. Upcycling thick shipping containers provides structural integrity capable of supporting substantial weight. Learning how to make a sturdy gift box from shipping box materials requires reinforcing corner joints and wrapping raw edges neatly. Double-walled corrugated board offers impressive compression strength, while covered surfaces hide rugged industrial markings underneath a flawless, elegant exterior finish.
Double-Wall Reinforcement Techniques
Heavy contents exert outward lateral pressure on container walls during transport. Reinforce your container by cutting secondary interior wall panels that match the exact internal height and width of your box. Glue these extra panels directly against the inner walls with the corrugated flutes running vertically. This cross-lamination double-wall technique increases vertical stack strength by over two hundred percent. It prevents sidewall bulging and protects heavy items against accidental drops, impacts, or rough handling.
DIY cardboard present box with lid for Classic Holiday Gift-Giving
Classic holiday present boxes feature deep, square bases and snug, shallow lids that create an exciting opening experience. Constructing these traditional two-piece designs allows you to mix complementary colors and contrasting textures between top and bottom. Crafting a DIY cardboard present box with lid ensures your holiday presents sit neatly beneath the tree without sagging or tearing. Custom dimensions allow you to size the box precisely to your gift, eliminating excess internal space and reducing the need for wasteful plastic filler.
Creating Seamless Edge Wrap Finishes
Exposed raw corrugated edges can spoil the polished appearance of a handmade container. Hide raw edges by wrapping decorative paper or thin cover stock completely over the top rims. Cut your exterior wrapping paper two centimeters taller than the wall height. Fold this excess paper smoothly over the top raw edge and secure it firmly against the interior wall. Smooth out all air bubbles using a flat plastic squeegee. This creates a clean rim that looks like expensive commercially manufactured packaging.
Cute gift boxes to make at home out of cardboard for Party Favors
Party favors, wedding gifts, and small event giveaways benefit immensely from custom charm and creative structural shapes. You can transform small pieces of scrap paperboard into delightful pillow boxes, pyramid pouches, or mini trunk chests. Exploring cute gift boxes to make at home out of cardboard allows you to mass-produce memorable favors quickly on a modest budget. Customizing each container with handwritten guest names, small botanical sprigs, or wax seals adds a warm personal touch that guests will cherish.
Assembling Curved Pillow Boxes
Pillow boxes offer an elegant curved silhouette that requires no glue for final closure. Cut a rectangular sheet of thin paperboard and fold it in half to form a tube, securing the side seam with strong double-sided tape. Use a round object like a cup or tape roll to score curved crescent lines across the open top and bottom ends. Fold these scored crescent flaps inward on both sides. The natural tension of the curved folds pops the tube outward into an eye-catching, pillow-shaped container ideal for small treasures.
How to decorate a plain cardboard gift box for a Professional Finish
An unadorned kraft container acts as a clean canvas ready for creative artistic enhancement. Decorating plain surfaces requires applying balanced visual elements, rich textures, and harmonizing color palettes. Learning how to decorate a plain cardboard gift box involves using metallic inks, fabric overlays, dried botanicals, or custom rubber stamps. Applying these creative techniques masks raw material flaws while elevating simple paperboard into a stunning work of art that captures attention before it is even opened.
Stenciling and Metallic Ink Application
Metallic inks, wax seals, and stenciled patterns create eye-catching contrast on raw kraft surfaces. Secure a geometric stencil flat against your box surface using painter’s tape. Apply thick acrylic paint or metallic ink using a dense foam pouncer, taking care not to overload the sponge. Remove the stencil immediately while the paint is wet to ensure sharp, clean lines without bleeding. Adding gold or silver leafing along the top edge adds a subtle touch of luxury that reflects light beautifully.
DIY cardboard gift box for birthday presents Customized for Any Age
Tailoring custom containers for birthday celebrations allows you to integrate personalized themes, favorite colors, and playful structural interactive features. You can build internal dividers, surprise explosion panels, or multi-tiered compartments inside a single outer shell. Crafting a DIY cardboard gift box for birthday presents ensures your presentation matches the unique personality of the recipient. A custom box turns the act of opening a present into an engaging, multi-step experience that builds excitement and genuine joy.
Building Internal Compartments and Dividers
Internal dividers keep multi-item gifts organized, visually appealing, and protected from colliding during transport. Measure the interior dimensions of your assembled base container. Cut strips of dense paperboard equal to the internal height, adding three centimeters to the total length for attachment tabs. Score and fold the end tabs at right angles, applying double-sided tape to secure them to the interior walls. Interlocking intersecting strips with half-depth slots creates a rigid grid system that holds individual items securely in place.
How to craft a mini cardboard gift box for Jewelry and Small Favors
Miniature containers require extreme precision and delicate handling because small construction flaws are immediately noticeable. Standard thick corrugated board is often too bulky for micro-containers measuring under five centimeters square. Learning how to craft a mini cardboard gift box relies on thin paperboard, precise scalpels, and light adhesive application. These tiny containers are perfect for housing rings, delicate earrings, rare coins, or small keepsake tokens while providing superior structural protection.
Micro-Crafting Tools and Precision Glue Application
Working on a miniature scale requires fine-pointed tools to maintain accuracy. Use a precision hobby knife fitted with a sharp blade rather than a heavy utility knife. Apply liquid adhesives using a fine-tipped applicator or the point of a toothpick to prevent excess glue from squeezing out onto visible surfaces. Press mini seams together using small plastic craft clamps or wooden clothespins while drying. This careful approach guarantees clean micro-corners and a flawless, professional final product.
Inexpensive DIY gift packaging ideas cardboard Solutions for Small Businesses
Small business owners, artisan makers, and independent crafters can drastically cut packaging overhead costs by building custom containers in-house. Commercial custom-printed boxes often require massive minimum order quantities and expensive shipping fees. Adopting inexpensive DIY gift packaging ideas cardboard strategies allows micro-brands to produce bespoke, eco-friendly packaging on demand. Customizing raw containers with affordable rubber logo stamps creates an unboxing experience that builds strong brand identity and loyal customer engagement.
Branding Raw Packaging with Custom Rubber Stamps
Custom rubber stamps offer an affordable way to apply consistent branding across all your product packaging. Order a high-density rubber stamp featuring your business logo, brand icon, or website URL. Use waterproof, archival pigment ink pads to stamp your design onto flat cardboard sheets before scoring and folding. Stamping flat sheets ensures even pressure distribution and crisp line transfers every time. This simple, cost-effective branding technique gives your handmade products a polished, professional image without commercial expenses.
How to make a folded cardboard box for gifts with Integrated Lid Design
One-piece folded containers featuring attached flip-top lids offer exceptional convenience, structural strength, and rapid assembly. These designs eliminate the need to construct separate tops and bases, saving both material and crafting time. Learning how to make a folded cardboard box for gifts with an integrated lid relies on precise score lines along a single continuous paperboard layout. The resulting clamshell container opens smoothly along a reinforced back hinge, presenting its contents elegantly upon opening.
Drafting a One-Piece Clamshell Layout
Drafting a continuous clamshell layout requires mapping the base, back wall, top lid, and side tuck flaps onto a single sheet. Draw your rectangular base in the center of your material. Extend side walls outward from all four base edges. Attach the top lid panel directly to the top edge of the rear wall panel, adding side tuck flaps to the outer lid perimeter. Score all interior fold lines deeply before cutting the outer profile. This single-piece template folds into a rigid hinged box instantly.
Simple cardboard box craft ideas for gift giving Using Scrap Materials
Discarded paperboard scraps, cereal boxes, and tissue backing often end up in the trash despite being prime crafting stock. Transforming these small leftover pieces into functional containers is an ideal way to practice zero-waste crafting. Exploring simple cardboard box craft ideas for gift giving allows you to craft charming gift tags, gift card holders, and tiny favor boxes out of materials you already own. Reusing scrap material refines your folding and scoring techniques while saving money on craft supplies.
Turning Cereal Boxes into Gift Card Holders
Cereal box paperboard offers the perfect balance of flexibility, thinness, and structural resilience for small paper crafts. Flatten your empty box and lightly sand the printed glossy exterior to remove the slick coating. Apply a thin layer of craft paint, decorative paper, or fabric over the sanded side using a spray adhesive. Once dry, cut and fold the prepared board into compact envelope boxes designed specifically for gift cards. This quick project turns food packaging into practical, elegant gift packaging.
How to Make Your Own Jewelry Organizer from Recycled Materials
DIY Nail Polish with Natural Ingredients – Recipe at Home
How to Make a Homemade Cork Bulletin Board – for Better Organization
How to turn scrap cardboard into a custom gift box of Any Size
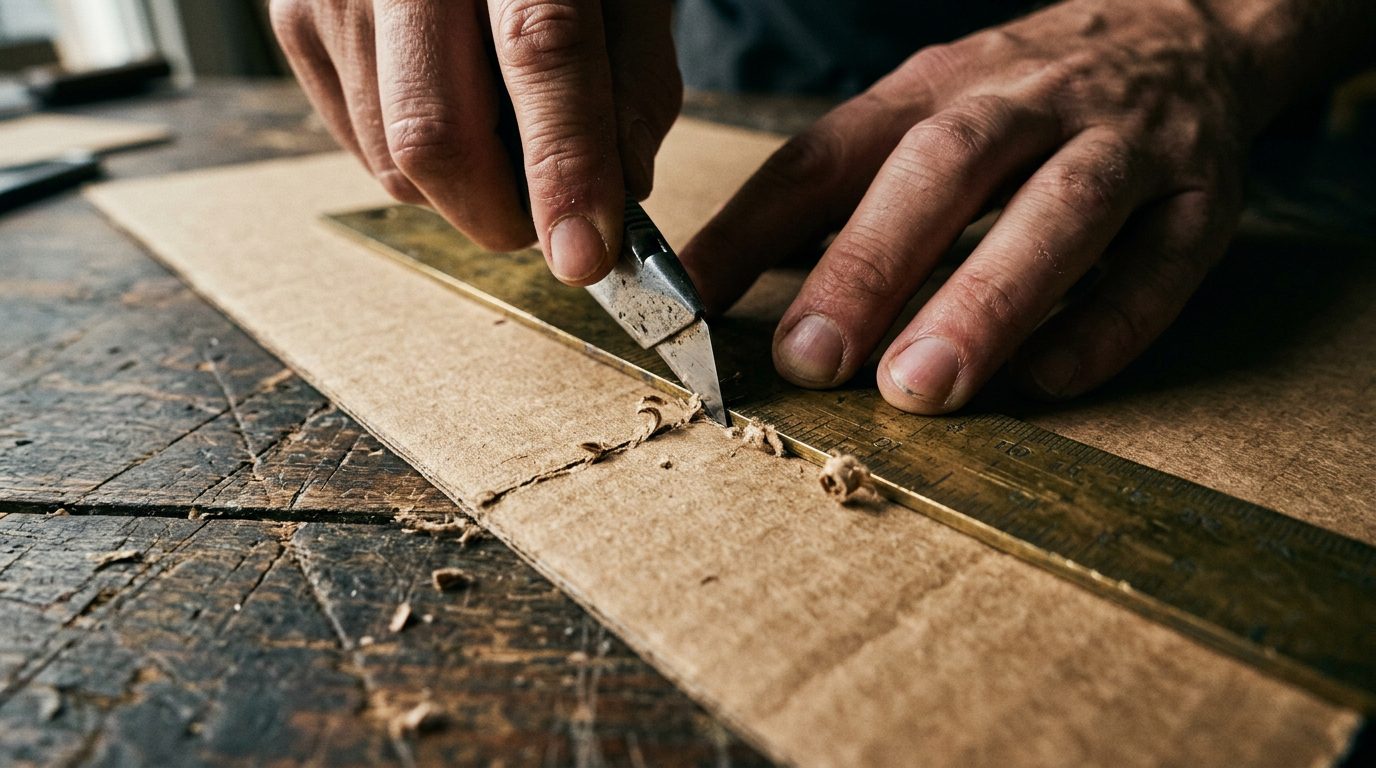
Standard store-bought boxes rarely match unique, oddly shaped presents like long candles, irregular pottery, or wide artwork. Learning how to turn scrap cardboard into a custom gift box allows you to tailor packaging to exact, non-standard dimensions. You eliminate awkward empty spaces, reduce inner protective padding requirements, and ensure your gift stays firmly centered. Custom-fit packaging demonstrates extra care and thought, signaling to the recipient that their gift was thoughtfully prepared from start to finish.
Custom Sizing Formula for Irregularly Shaped Objects
To package an irregular object accurately, place it directly onto a flat sheet of scrap paperboard. Trace a loose rectangular bounding box around the widest outer points of the object using a pencil, adding a two-centimeter margin on all four sides. Measure the total height of the object at its tallest point and add this dimension to each of the four sides of your rectangle template. Score the inner rectangle lines to form your box floor, then fold the outer side panels upward to construct your custom-fit base.
Key Takeaways
-
Scoring is essential: Always score fold lines with a ruler and bone folder or blade back to ensure crisp, 90-degree corners.
-
Account for clearance: Add 2-3 mm to lid templates so they slide smoothly over base containers without binding.
-
Upcycle effectively: Discarded shipping containers and cereal boxes can be transformed into high-end, eco-friendly luxury packaging.
-
No-glue options exist: Self-locking flaps and geometric origami folds allow fast container assembly without adhesives.
-
Reinforce for weight: Double-wall internal vertical inserts increase structural load capacity for heavy items.
Frequently Asked Questions
What tools are essential for making cardboard gift boxes at home?
You need a metal ruler, a sharp utility knife, a cutting mat, double-sided tape or quick-drying craft glue, and a bone folder or blunt edge for clean scoring.
How do I stop raw cardboard edges from looking messy?
Wrap outer decorative paper over the top rim into the interior walls, or seal exposed edges using decorative wash tape or metallic ink paint pens.
Which adhesive works best for assembling heavy-duty cardboard boxes?
Hot glue provides an instant structural bond for thick corrugated board, while high-tack PVA glue works best for thin paperboard where flat seams are required.
How do I choose the right cardboard thickness for my gift?
Use thin cereal box paperboard for small favors or gift cards, medium-density craft board for light items, and corrugated shipping boxes for heavy or fragile items.
How can I make a cardboard gift box waterproof or moisture-resistant?
Apply a thin layer of clear acrylic sealer or matte decoupage varnish over the exterior surfaces after decorating to protect the paper fibers from moisture.
Elevate Your Gift Wrapping Game Today
Stop spending money on disposable gift bags and flimsy store-bought paper. Master the simple art of custom container design to create unforgettable, eco-friendly packaging that delights everyone. Grab your tools, gather your scrap materials, and craft your first custom box today!