Befrey
Your First Woodworking Project: 5 Simple Things You Can Make from Wood in a Single Afternoon
Getting started in woodworking often feels intimidating when you look at massive workshops filled with expensive power tools. You might think that building anything real requires years of practice, specialized machinery, and a massive budget. The truth is that your first woodworking project does not need to be a complex dining table or a custom set of kitchen cabinets. You can easily create beautiful, highly functional home items in just a single afternoon using basic hand tools or affordable entry-level equipment.
By starting small, you build real confidence while mastering core fundamental skills like precise measuring, straight cutting, and smooth sanding. The secret to success lies in choosing beginner-friendly wood builds that rely on simple geometry and straightforward joinery techniques. In this detailed guide, you will discover five beginner woodworking projects that you can build today, along with the exact tools, lumber choices, and techniques needed to bring your ideas to life.
1. Essential Tools and Safety Gear for Every Beginner
Before making your very first saw cut, you need a basic set of reliable tools to make your workspace safe and efficient. You do not need to spend thousands of dollars on heavy machinery to achieve professional results on your first woodworking project. Starting with a compact set of high-quality essentials allows you to learn proper technique without feeling overwhelmed by complex mechanics.
Focus your initial budget on fundamental hand and power tools that handle measuring, cutting, driving fasteners, and smoothing surfaces. A sturdy work surface, such as a temporary sawhorse setup or a basic workbench, serves as the foundation for every single cut you make.
Core Hand Tools You Must Have
Every beginner needs a reliable tape measure, a speed square for checking 90-degree angles, and a sturdy hammer. A combination square is also incredibly useful for marking accurate layout lines along the entire length of a board. Do not skip buying a set of sharp wood chisels, as they help clean up joint edges and tight corners.
Essential Entry-Level Power Tools
A simple corded or cordless drill is non-negotiable for pre-drilling pilot holes and driving screws quickly. A compact circular saw or a simple miter saw will handle almost all your cross-cutting needs for small projects. Finally, a random orbital sander saves you hours of manual labor and delivers a silky-smooth finish.
Non-Negotiable Safety Equipment
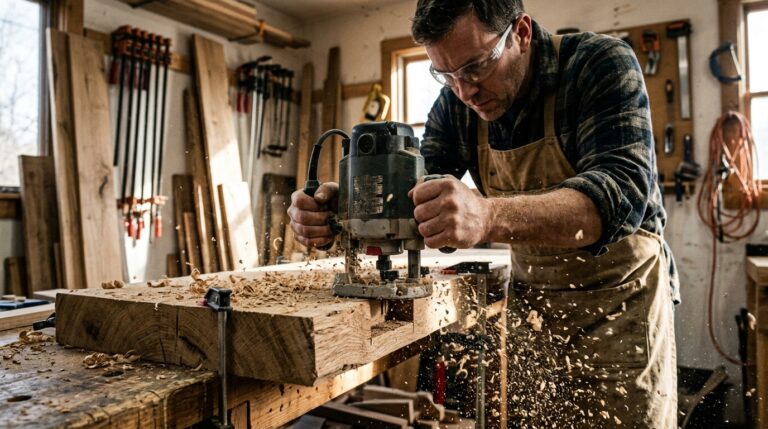
Protecting your sight and hearing must always be your top priority in the workshop, regardless of project size. Always wear clear safety glasses that fit snugly against your face to keep flying sawdust out of your eyes. Invest in comfortable ear protection and a well-fitting dust mask or respirator to shield your lungs from fine wood particles.

2. Choosing the Right Beginner-Friendly Lumber
Selecting the right type of wood plays a massive role in how smoothly your first woodworking project goes. Walking into a home improvement store or lumberyard can feel overwhelming due to the sheer variety of board species, grades, and dimensions available. For your initial builds, you want materials that are inexpensive, widely available, soft enough to cut easily, and forgiving of small mistakes.
Softwoods like pine, cedar, and fir are the absolute gold standard for newcomers because they are budget-friendly and easy on cutting blades. Learning how to carefully inspect boards for twists, bows, and knots ensures that your finished project turns out flat, square, and structurally sound.
The Best Softwoods for Quick Afternoon Builds
Construction-grade pine boards, often labeled as Select Pine or Common Board, are perfect for indoor projects due to their light weight and bright appearance. Cedar is another fantastic choice if you want to make outdoor items like garden planters, as its natural oils resist rot and insect damage. Whitewood and Douglas fir are also highly affordable options that hold screws well and take stain evenly.
How to Inspect and Select Straight Boards
Never grab the first board on top of the stack without checking it thoroughly for physical defects. Sight down the edge of the board like an arrow to check for noticeable twists, bows, or side-to-side crooks. Choose boards that feel relatively light, have minimal knot holes, and feature tight, straight grain lines along their faces.
3. Project 1: The Rustic Wooden Serving Tray
A custom wooden serving tray is one of the most rewarding quick woodworking builds you can undertake in an afternoon. This project teaches you how to join flat boards together, attach sturdy side rails, and install decorative metal handles for a polished, functional finished piece. It makes a stunning centerpiece for your coffee table or a thoughtful, handmade gift for friends and family.
Because a serving tray uses minimal raw lumber, it is an exceptionally low-cost project that yields high-impact visual results. You can easily customize its overall dimensions to fit your specific living room furniture or breakfast-in-bed preferences.
Materials and Cut List
To build a standard 12-inch by 20-inch tray, you need a single 1×6 pine board and a length of 1×2 pine for the outer frame borders. Cut two 20-inch pieces from your 1×6 board to form the bottom base, and four matching border pieces from your 1×2 lumber. You will also need wood glue, 1.25-inch pocket hole screws or finish nails, and two cabinet handles.
Step-by-Step Assembly Instructions
Start by gluing the two 1×6 bottom boards edge-to-edge, clamping them tightly together until the glue dries completely. Next, measure and attach the 1×2 side rails around the perimeter using wood glue and finish nails driven from the bottom. Sand the entire tray smooth, apply your choice of wood stain or protective polyurethane, and screw the metal handles onto the narrow sides.
4. Project 2: Minimalist Floating Wall Shelves
Adding floating shelves to your home is an incredible way to clear floor space while showing off your new DIY skills. These easy DIY wood crafts rely on simple box-style construction or hidden bracket support systems to give the illusion of floating unsupported on your wall. They are ideal for displaying small books, indoor house plants, framed photos, or decorative ceramics.
Building floating shelves teaches you the critical importance of square cuts and secure wall anchoring techniques. Once you master this basic design, you can easily build matching sets across your entire home.
Tools and Lumber Requirements
You can construct a sturdy floating shelf using inexpensive 1×6 pine boards or smooth 3/4-inch hardwood plywood scraps. A pocket hole jig makes assembling the internal support frame fast, clean, and completely invisible from the outside. You will also need a stud finder, a bubble level, and heavy-duty drywall anchors or wall screws.
Installation and Mount Security
Assembly involves constructing a simple hollow wood sleeve that slides snugly over a hidden wooden mounting bracket attached to your wall. Always use a stud finder to locate solid wall studs, securing the inner mounting bracket directly into structural framing with 3-inch wood screws. Slide your finished shelf box over the bracket and drive two small screws through the top face to lock it permanently in place.
5. Project 3: A Classic Desktop Organizer
A messy workspace can severely hamper your daily productivity, making a custom desktop organizer a exceptionally practical single afternoon wood build. This project allows you to practice making repeated precise cuts and working with smaller, delicate pieces of lumber. You can tailor the compartments to hold your specific pens, notebooks, mail, or electronic devices perfectly.
Because a desktop organizer sits close to your eyes, it provides a fantastic opportunity to practice fine sanding and detail finishing techniques. It is a fantastic build for using up leftover scrap wood from larger previous projects.
Designing Functional Compartments
Sketch out your design on paper first, measuring your everyday items like notebooks, tablet computers, and stationery to ensure proper fit. Incorporate angled side dividers or stepped back shelves to keep shorter items visible in the front while taller folders stay secure in the back. Keeping your design simple with 90-degree box joints ensures a fast, frustration-free build process.
Joining Thin Material Cleanly
When working with thin 1/2-inch or 1/4-inch craft boards, traditional wood screws can easily split the wood grain if you skip prep steps. Always drill pilot holes slightly smaller than your fasteners, or rely entirely on quality PVA wood glue reinforced with small brad nails. Use painter’s tape as temporary clamps while the glue cures to keep your joint lines tight and perfectly aligned.
6. Project 4: The Heavy-Duty Garden Planter Box
If you want to bring your woodworking skills outdoors, a simple cedar planter box is an outstanding weekend project to tackle. Cedar offers exceptional natural weather resistance, meaning your outdoor planter will withstand rain, sun, and dirt without rotting prematurely. This build focuses on heavy-duty joinery that holds up under the weight of wet potting soil and growing plant roots.
You can customize the size of your planter box to fit narrow windowsills, wide back patios, or compact apartment balconies. It serves as an instant upgrade to your outdoor living space while providing a home for fresh herbs or colorful flowers.
Outdoor Wood Species and Hardware
Cedar or redwood are the best choices for outdoor planters, though pressure-treated pine can also work if lined properly to prevent chemical leaching. Always use stainless steel or exterior-coated deck screws that resist rust and corrosion when exposed to outdoor moisture over time. Avoid standard interior wood glue; instead, choose a waterproof glue explicitly rated for exterior use.
Drainage and Assembly Best Practices
Construct the planter body by joining four side walls to a solid bottom plate using butt joints reinforced with corner support cleats. Drill at least four to six 1/2-inch drainage holes through the bottom board to prevent plant roots from becoming waterlogged after heavy rain showers. Line the inside interior walls with porous landscape fabric to contain the soil while allowing excess water to drain freely.

7. Project 5: An Ergonomic Monitor Stand or Laptop Riser
Working long hours at a desk with poor screen posture can lead to severe neck strain, upper back pain, and visual fatigue. Building an ergonomic laptop riser or computer monitor stand instantly elevates your screen to eye level while creating valuable storage space underneath for your keyboard. This single afternoon build combines sleek modern aesthetics with immediate health and organizational benefits.
This project requires minimal lumber—often just a single short board—and can be assembled using basic joinery techniques in under two hours. It is one of the most practical and immediate upgrades you can make to your home office environment.
Ergonomic Height Calculations
To find your ideal screen height, sit up straight in your office chair and look directly straight ahead; the top third of your monitor screen should align with your natural eye level. Most standard desk setups require an elevation of roughly 3.5 to 5 inches off the desktop surface to achieve optimal neck alignment. Measure your computer base and keyboard width beforehand to ensure the stand offers plenty of clearance underneath.
Crafting Clean Waterfall Edges or Hairpin Legs
For a simple modern look, assemble a sleek three-sided U-shape riser using 1×8 pine or oak with pocket hole joinery hidden on the underside. Alternatively, you can take a solid 2-inch thick slab of attractive wood and attach short metal hairpin legs to the bottom corners with simple wood screws. Sand all edges thoroughly with fine-grit sandpaper to create soft, comfortable rounded edges that won’t irritate your wrists.
8. Sanding and Finishing Techniques for a Professional Look
The difference between an amateur-looking DIY project and a polished, professional piece of handmade furniture almost always comes down to surface preparation. Skipping steps during sanding will highlight every scratch, mill mark, and pencil line the moment you apply stain or clear coat. Investing an extra thirty minutes into proper sanding techniques dramatically transforms the final look and feel of your wood builds.
Finishing not only enhances the natural beauty of the wood grain but also protects your hard work against moisture, fingerprints, and daily wear and tear. Choosing the right finish depends on whether your project needs heavy durability or a soft, natural appearance.
The Progressive Sanding Process
Always sand your wood progressively through finer grits of sandpaper, starting with 120-grit to remove surface roughness and manufacturing marks. Move up to 180-grit to smooth out the scratch pattern left by the previous paper, and finish with 220-grit for a silky touch. Always sand in the direction of the natural wood grain to prevent ugly cross-grain scratches that show through finishes.
Selecting the Perfect Clear Coat or Stain
Wood stains add color and highlight natural grain patterns, while clear coats provide essential physical protection against spills and scratches. Water-based polyurethane dries extremely fast, leaves no strong odor, and maintains the natural color of light woods like pine. For items that see heavy daily use or liquid exposure, oil-based polyurethane or protective wipe-on poly finishes offer superior durability.
Summary
-
Start Small: Simple afternoon projects build core confidence and foundational skills without requiring a massive budget or huge workspace.
-
Get Key Essentials: Invest in a basic set of reliable hand and power tools like a drill, circular saw, sander, and essential safety gear.
-
Select Softwoods: Choose budget-friendly pine, cedar, or fir boards that are easy to cut, lightweight, and forgiving of beginner mistakes.
-
Build Tray & Shelves: Learn basic joinery, edge-gluing, and wall-mounting techniques by constructing a rustic tray or floating wall shelves.
-
Organize Your Space: Improve daily functionality with a custom desktop organizer, an outdoor garden planter, or an ergonomic monitor riser.
-
Sand Thoroughly: Never skip progressive sanding (120 to 220 grit) and apply a durable protective finish for professional, long-lasting results.
Frequently Asked Questions (FAQ)
What is the easiest woodworking project for an absolute beginner?
The easiest project for an absolute beginner is a simple rustic serving tray or a basic desktop monitor riser. Both projects require only straight 90-degree cuts, basic screw or nail joinery, and minimal raw lumber. They allow you to master cutting, sanding, and finishing in just a couple of hours.
Do I need an expensive table saw to start woodworking at home?
No, you do not need an expensive table saw to start making beautiful wood builds. An affordable hand-held circular saw fitted with a straight-edge guide or a basic compound miter saw can execute almost every cross-cut needed for small beginner projects.
What type of wood is best for quick indoor projects?
Select Pine or Common Pine boards are the best choices for quick indoor DIY builds. Pine is widely available at all local home improvement stores, highly affordable, lightweight, easy to cut, and takes wood stain or paint remarkably well.
How do I keep my wood boards from splitting when driving screws?
To prevent wood from splitting when driving screws, always pre-drill pilot holes using a drill bit that matches the inner shank diameter of your screw. Pre-drilling removes the wood material instead of forcing it apart when the fastener enters the board face or edge grain.
Can I finish my woodworking project in the same afternoon I build it?
Yes, you can finish your project on the same day by using fast-drying wood finishes. Water-based wood stains and water-based polyurethanes typically dry to the touch in under an hour, allowing you to sand lightly between multiple protective coats within a single afternoon.
Call-to-Action (CTA)
Ready to transform your home with custom, handmade wooden decor? Stop overthinking your tool collection and pick up your first board of pine today! Grab your safety glasses, pick your favorite project from this list, and enjoy the unmatched satisfaction of creating something functional with your own two hands this weekend.